How to Monitor Airplane Traffic with a Raspberry Pi
Learn how to monitor airplane traffic with a Raspberry Pi. Track real-time flight data using PiAware and an ADS-B dongle. Simple setup for aviation enthusiasts!
Let me start by saying I love airplanes. Since I was a little boy, I have stared at the sky in amazement and spent every waking minute researching everything about airplanes. Fast-forward to 1996, when I joined the US Air Force as an electrician on, you guessed it, airplanes (F-15s, to be exact).
My passion for airplanes oozes from my pores, so much so that my young son is now just as enthused as I am and can now call out planes by sound. Recently, we witnessed the giant Russian Antonov land at a small airfield by our house in Switzerland.

Background about FlightAware Projects
It's not my first time starting a FlightAware Raspberry Pi project. According to FlightAware, I first created my first deployment back in 2017. Alex Ellis piqued my interest when he began making his FlightAware project in 2017.
What has changed from 2017 to now? It is light years easier to get up and running today. Previously, I was building Docker images and trying to make everything work with the USB Tuner and the container, loading data, etc. It was fascinating but very time-consuming.
FlightAware has streamlined the onboarding process considerably and simplified the PiAware software. Start by downloading a pre-made Raspberry Pi image with all the drivers and configuration and getting you up and running in the time it takes to burn the PiAware image on an SD Card.
PiAware Components
How does PiAware Work?
Aircraft determine their position using satellite (GNSS) and then broadcast this signal outwards as an open/un-encrypted radio signal called ADS-B (Automatic dependent surveillance-broadcast). Other aircraft and ground radar stations use this signal to determine where each plane is positioned and help avoid navigation and collision avoidance.
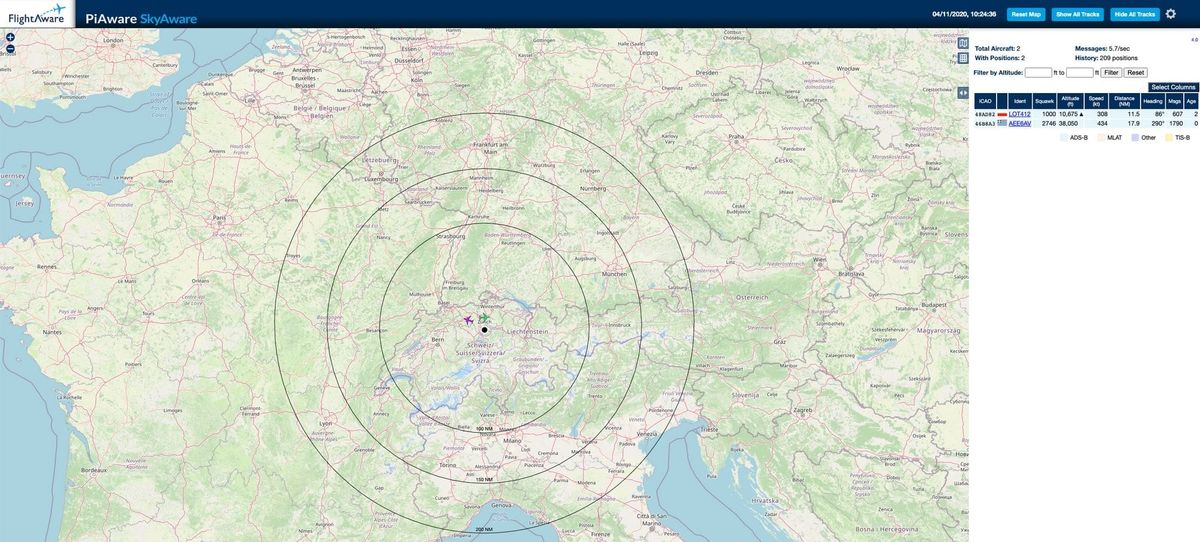
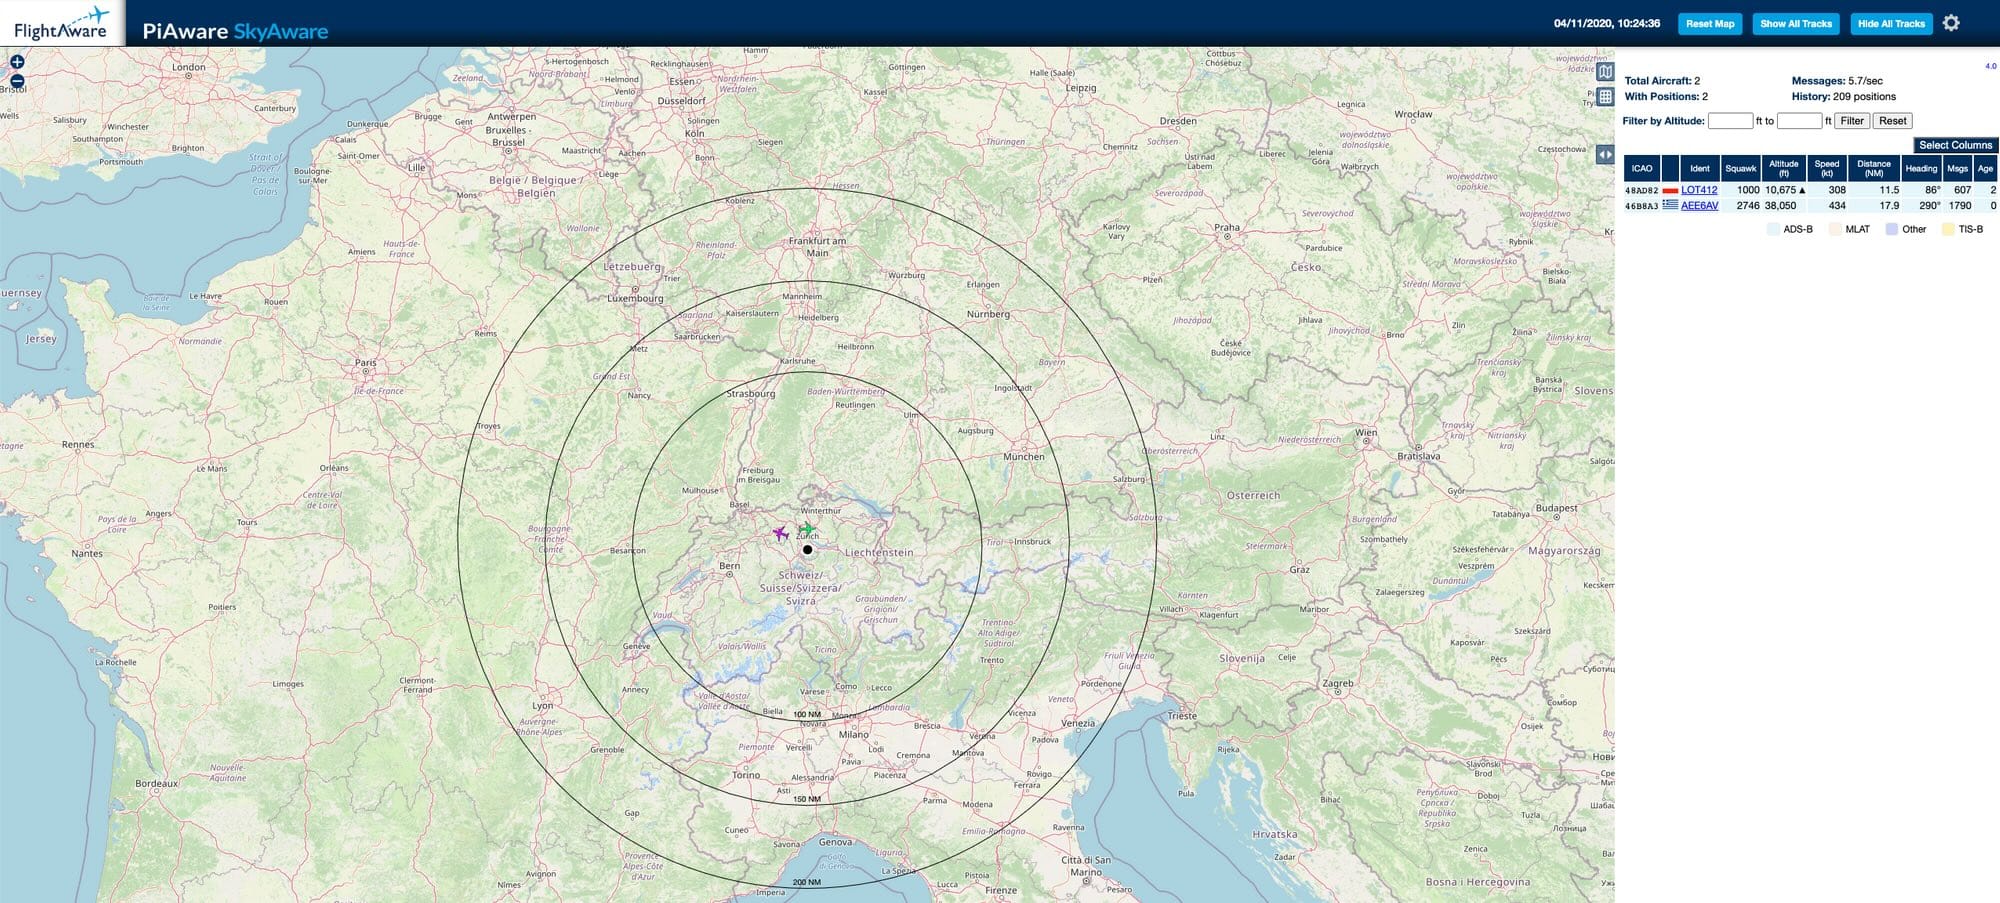
FlightAware is the most extensive flight tracking and data platform. FlightAware collects flight information and metrics and visualizes them with its powerful live flight tracking map. FlightAware collects data from air traffic control systems and crowdsources the information. Here is where our Raspberry Pi comes into the picture.
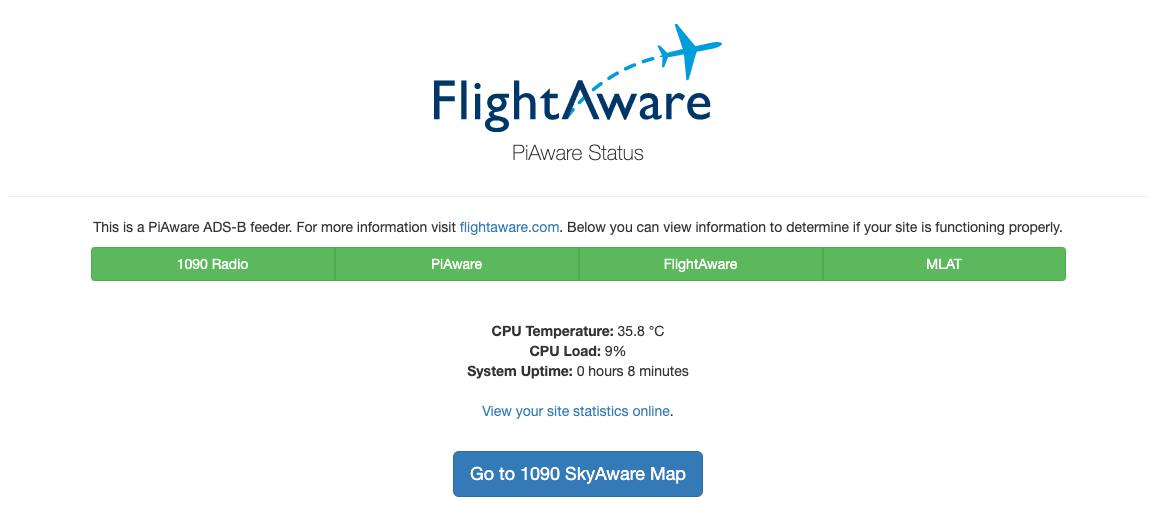
By creating a Raspberry Pi FlightAware ground station, we collect the ADS-B metrics and send them to FlightAware for visualization. The Raspberry Pi runs the FlightAware software, which provides the interfaces to a USB TV tuner responsible for recording the ADS-B signals.
Stay Updated
Get actionable AI & tech insights delivered every Friday. No fluff, just value.
Subscribe to The Weekly Byte →What you need to get started
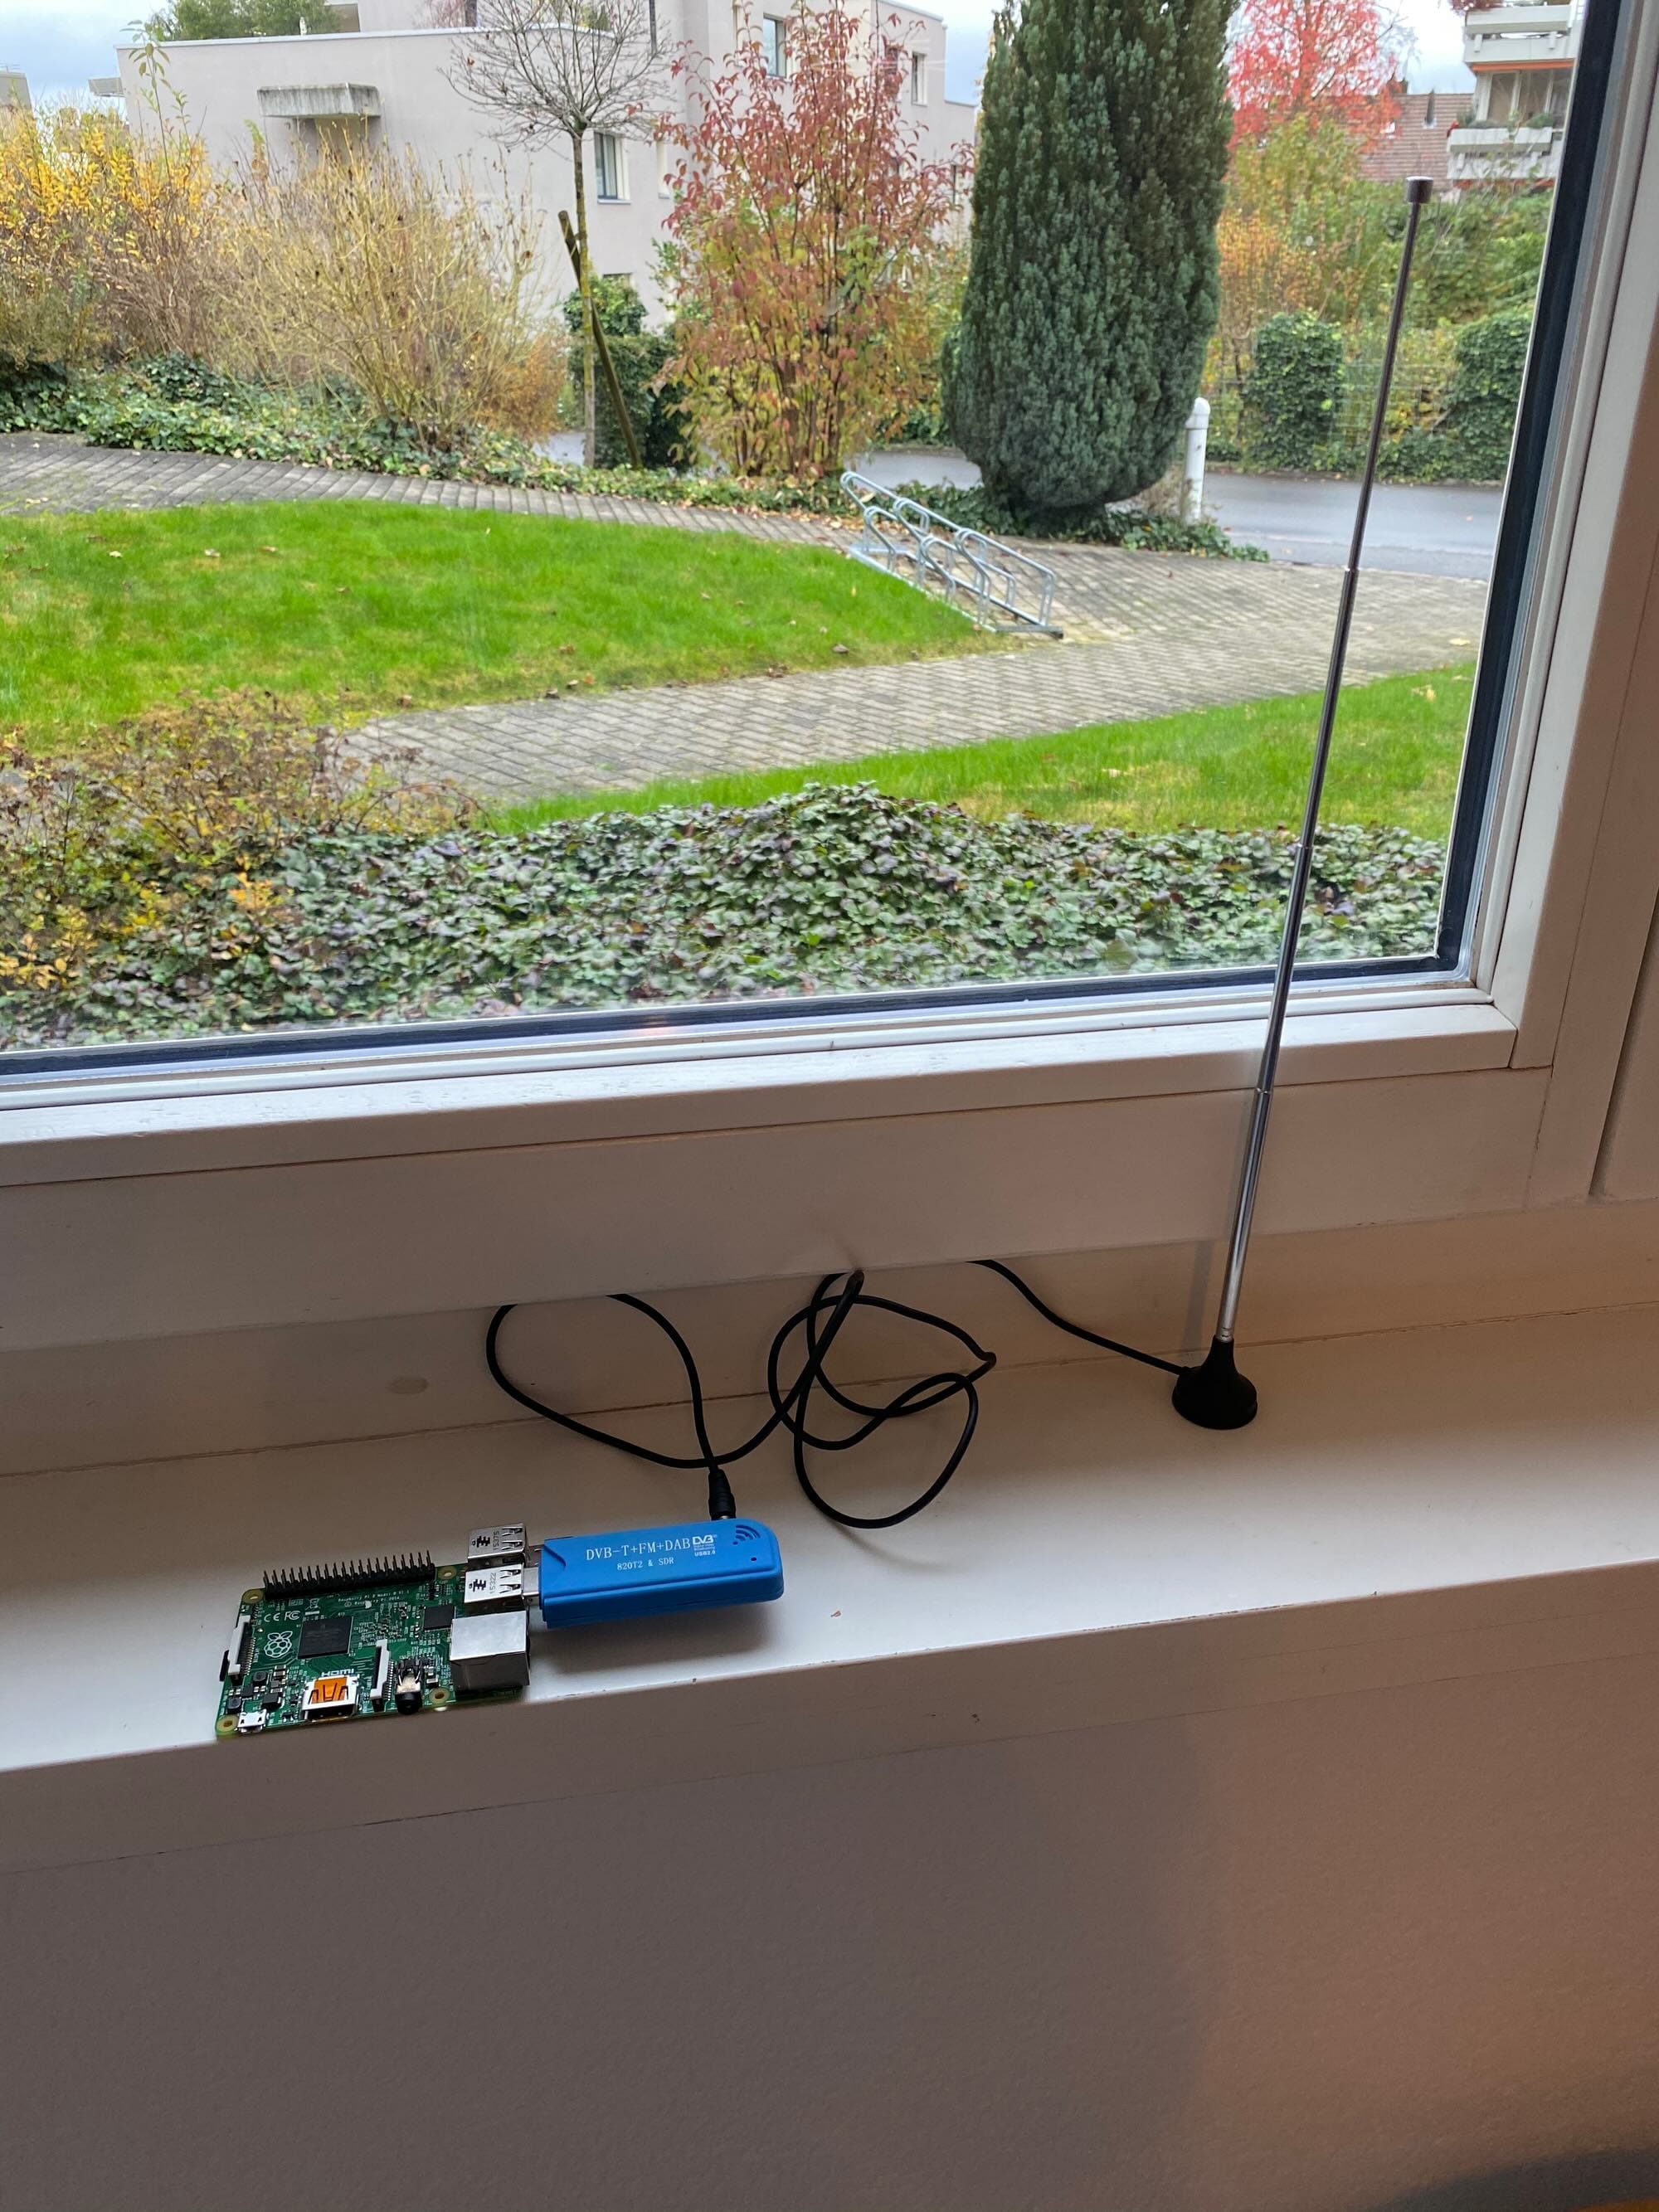
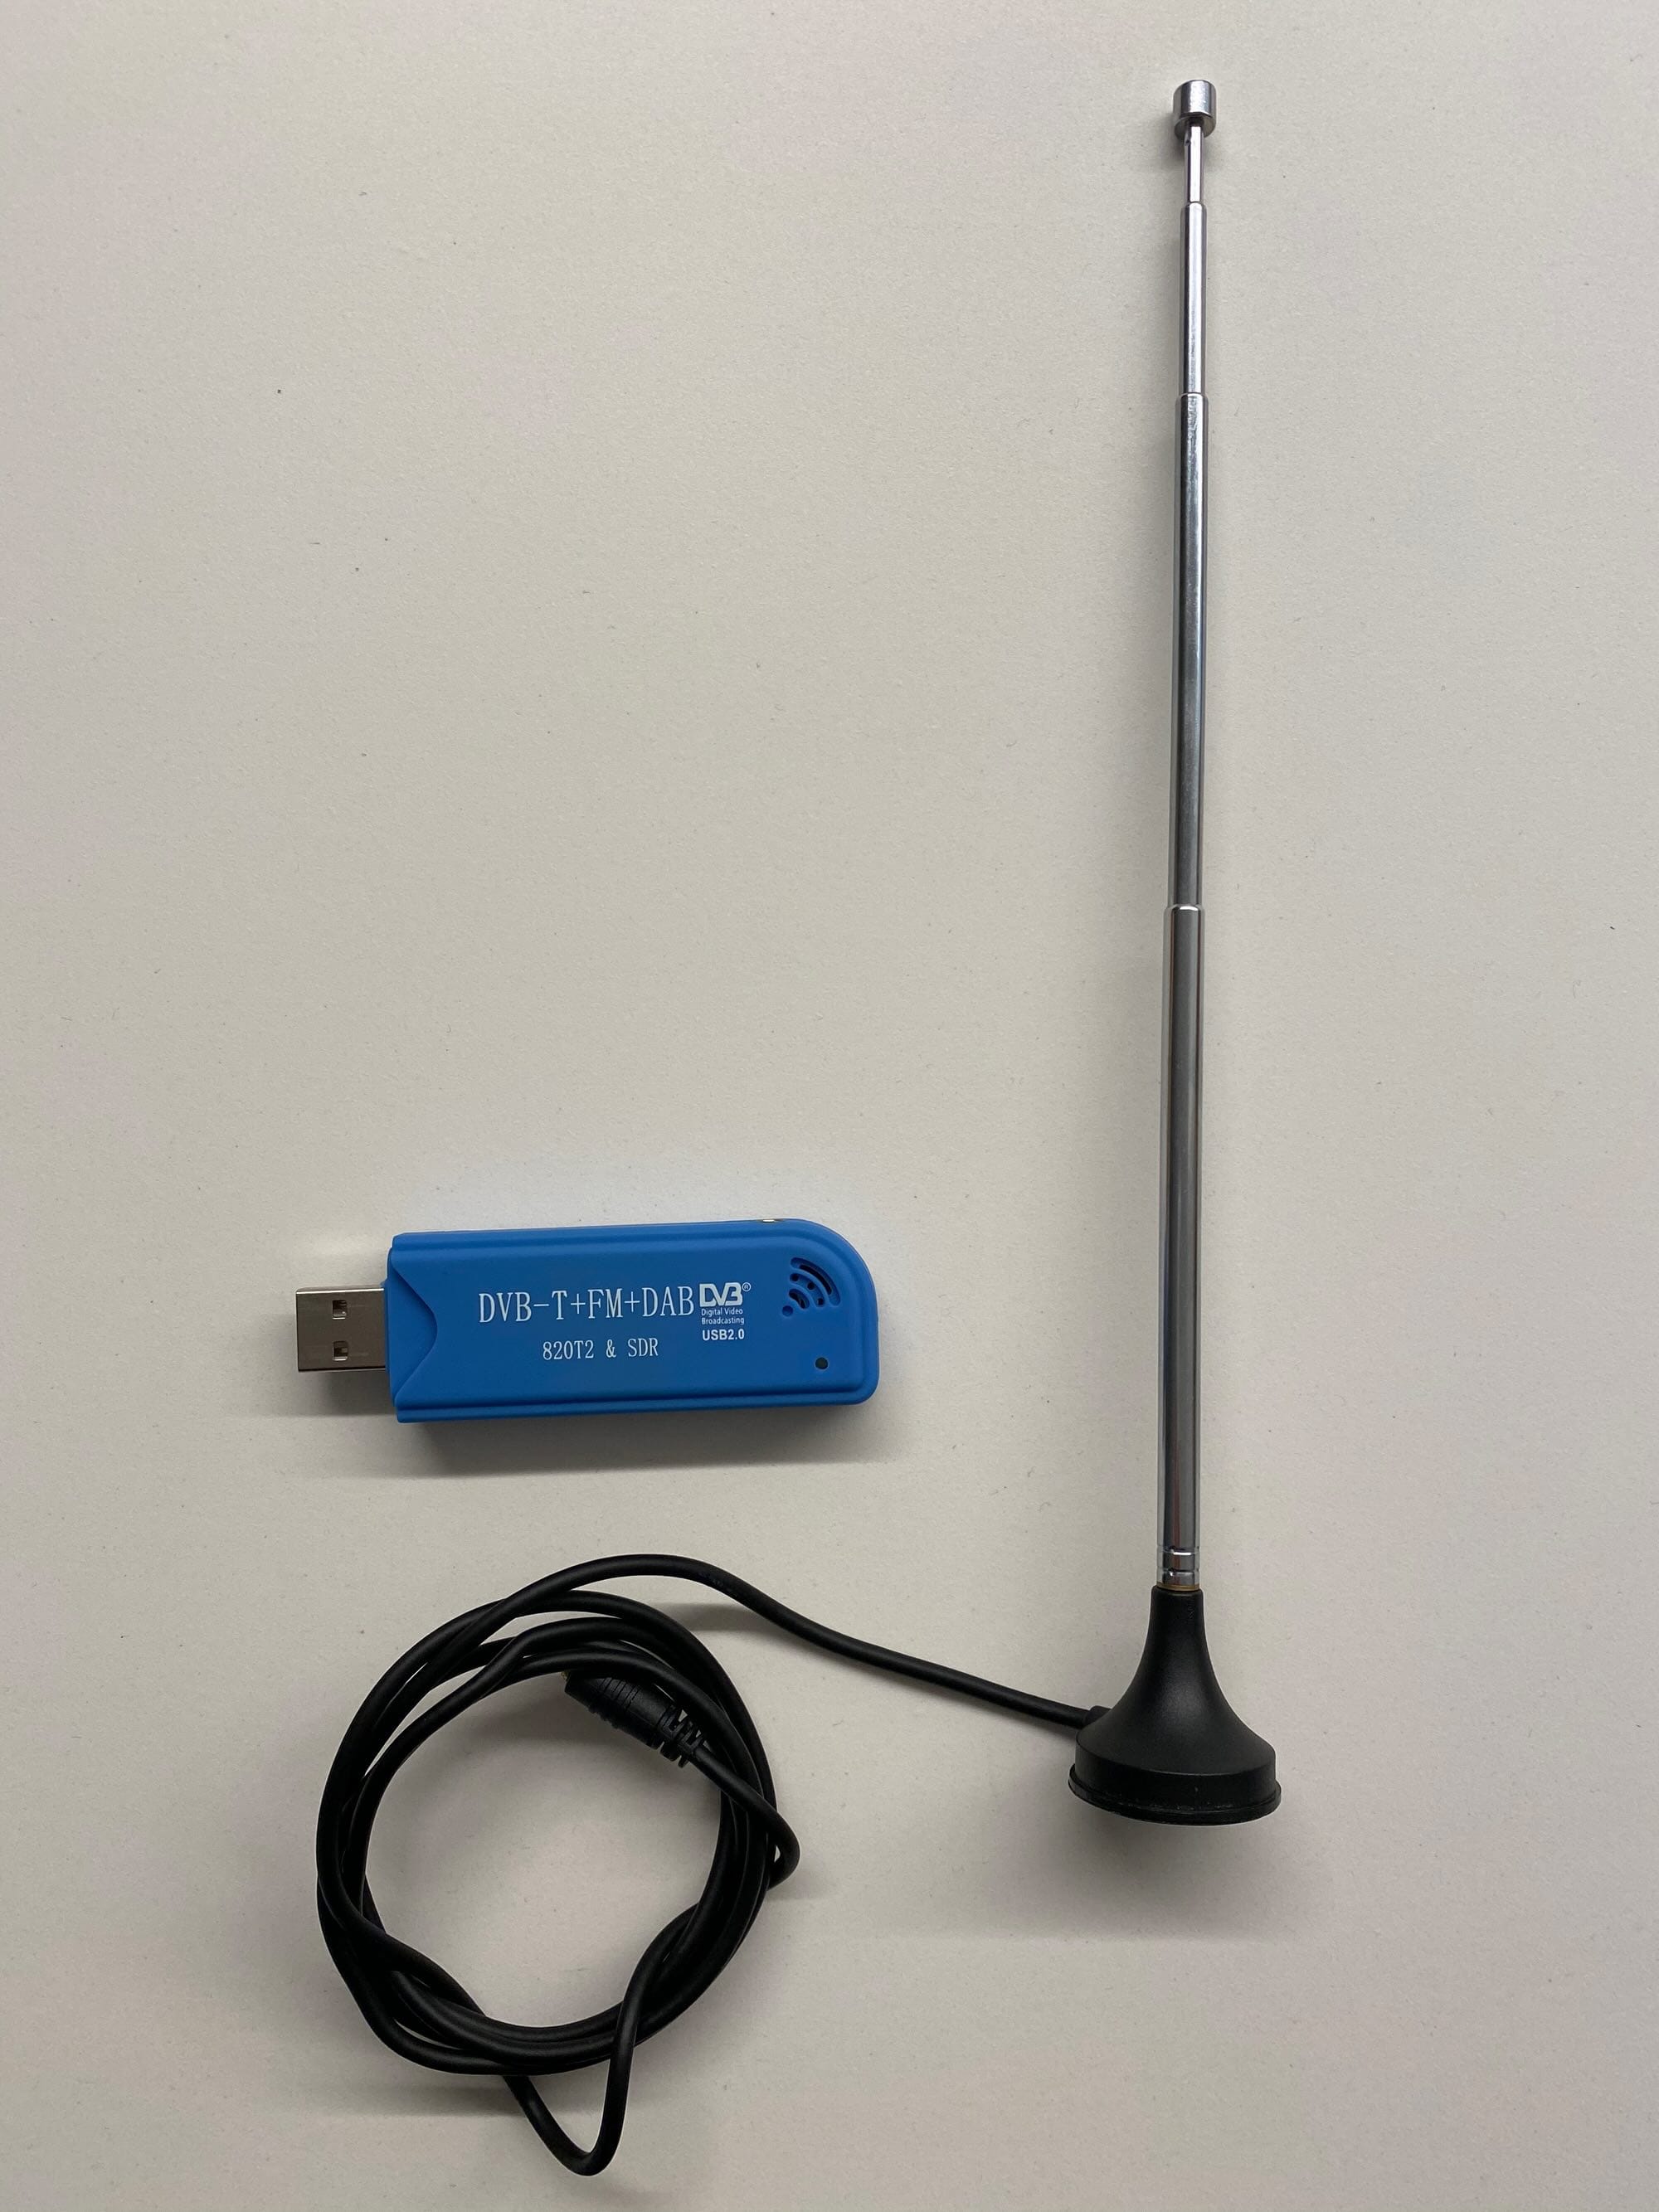
The PiAware team provides a bill of materials list to help you get started. You can use your Raspberry Pi or purchase a DVB-T (Digital Video Broadcasting - Terrestrial) USB tuner with a small antenna.
Building the kit yourself will set you back about $45. expensive USB tuner and antenna will add $20-40 but significantly increase the range.
The process of getting started is simple:
- Download the PiAware Raspberry Pi image
- Copy the image to the SD Card
- Add your configs so it can connect to your WiFi (Headless setup)
- Start up the Raspberry PI and connect to the IP
- Connect to FlightAware account
- Start recording plane traffic
Benefits of being a FlightAware Feeder
It is a cool project for the family to start tracking airplanes flying overhead, but you also contribute to the overall FlightAware project. Additionally, you receive a free Enterprise Subscription worth $89 per month to the FlightAware platform just for providing your data to FlightAware.
Every kid and sometimes parents in our neighborhood have learned about my Ground station and want to come see. Fun for all!
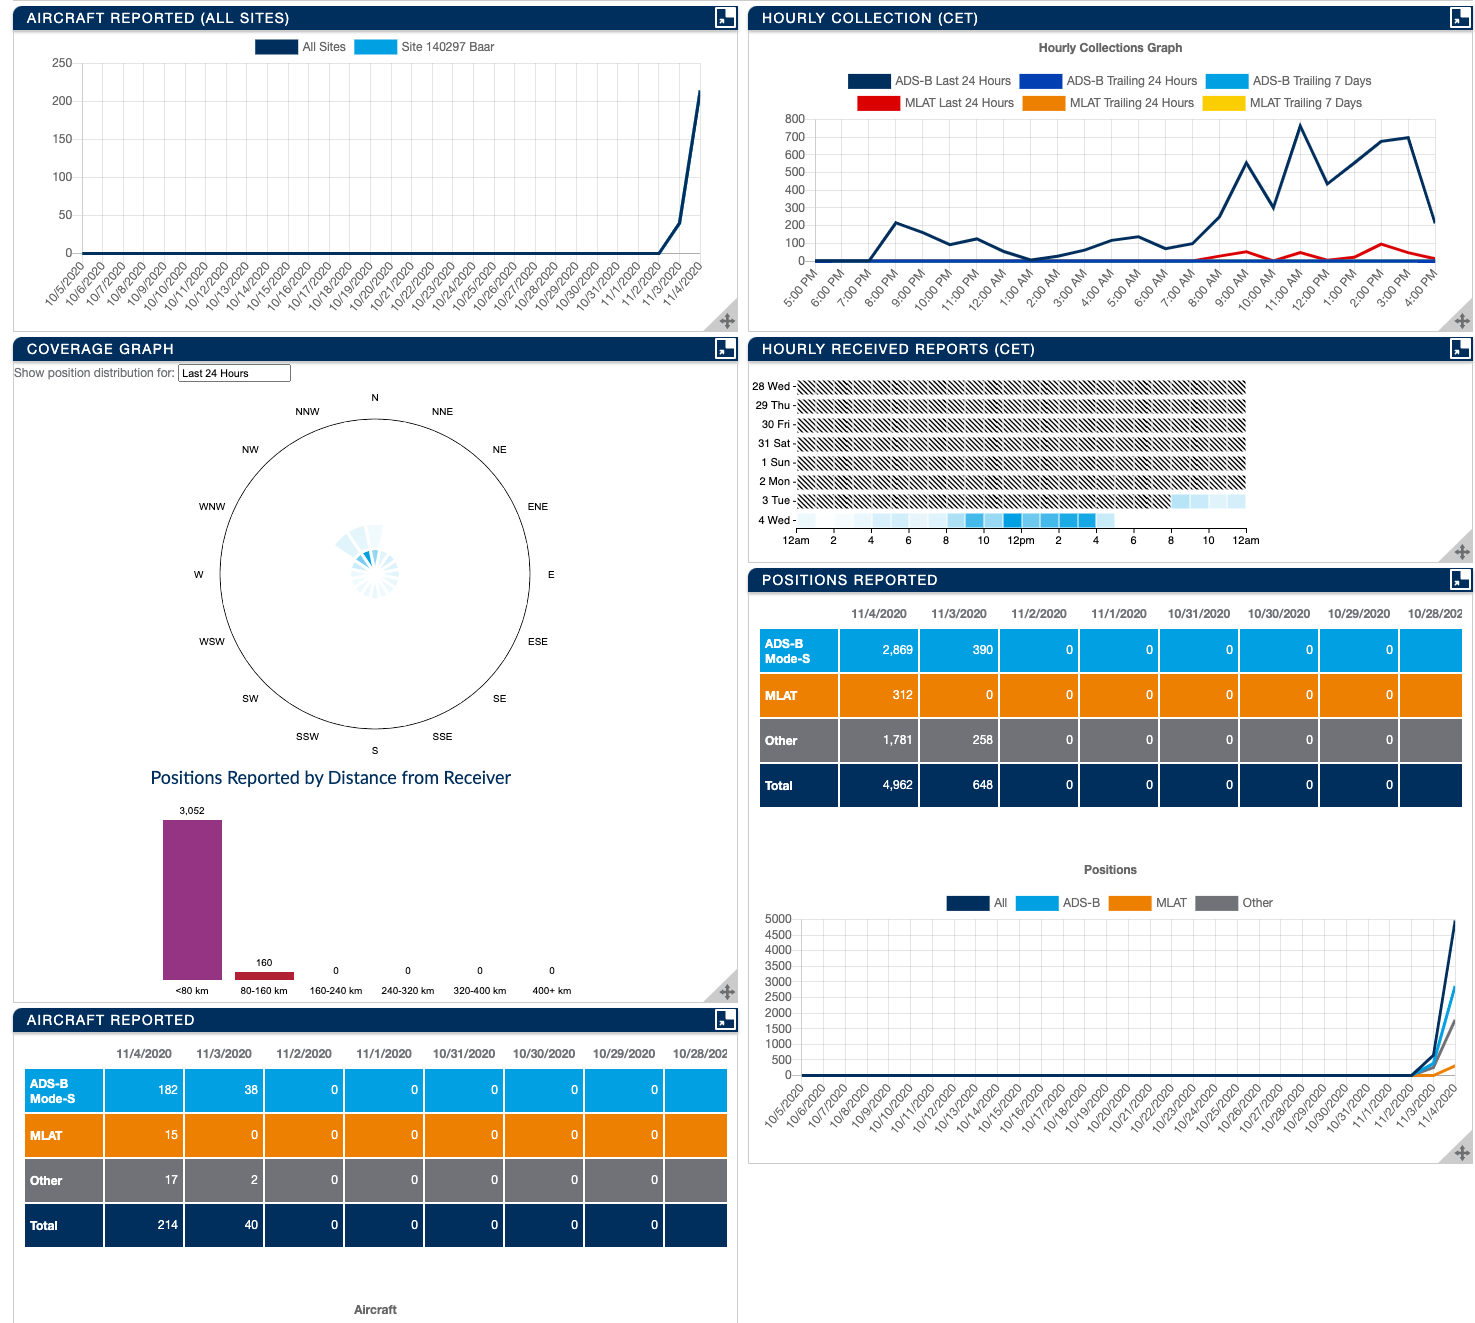
You can view my Ground Station statistics here - https://flightaware.com/adsb/stats/user/vegasbrianc
FAQ Section: Monitor Airplane Traffic with a Raspberry Pi
What equipment do I need to monitor airplane traffic with a Raspberry Pi?
To monitor airplane traffic, you'll need a Raspberry Pi, an ADS-B USB dongle, an antenna, and software like PiAware or FlightAware.
How does a Raspberry Pi monitor airplane traffic?
A Raspberry Pi, combined with an ADS-B USB dongle and antenna, receives signals from aircraft transponders, allowing you to track their real-time flight data.
What software is required to set up airplane traffic monitoring on a Raspberry Pi?
You can use software like PiAware or FlightAware, which are specifically designed to decode ADS-B signals and display airplane traffic data.
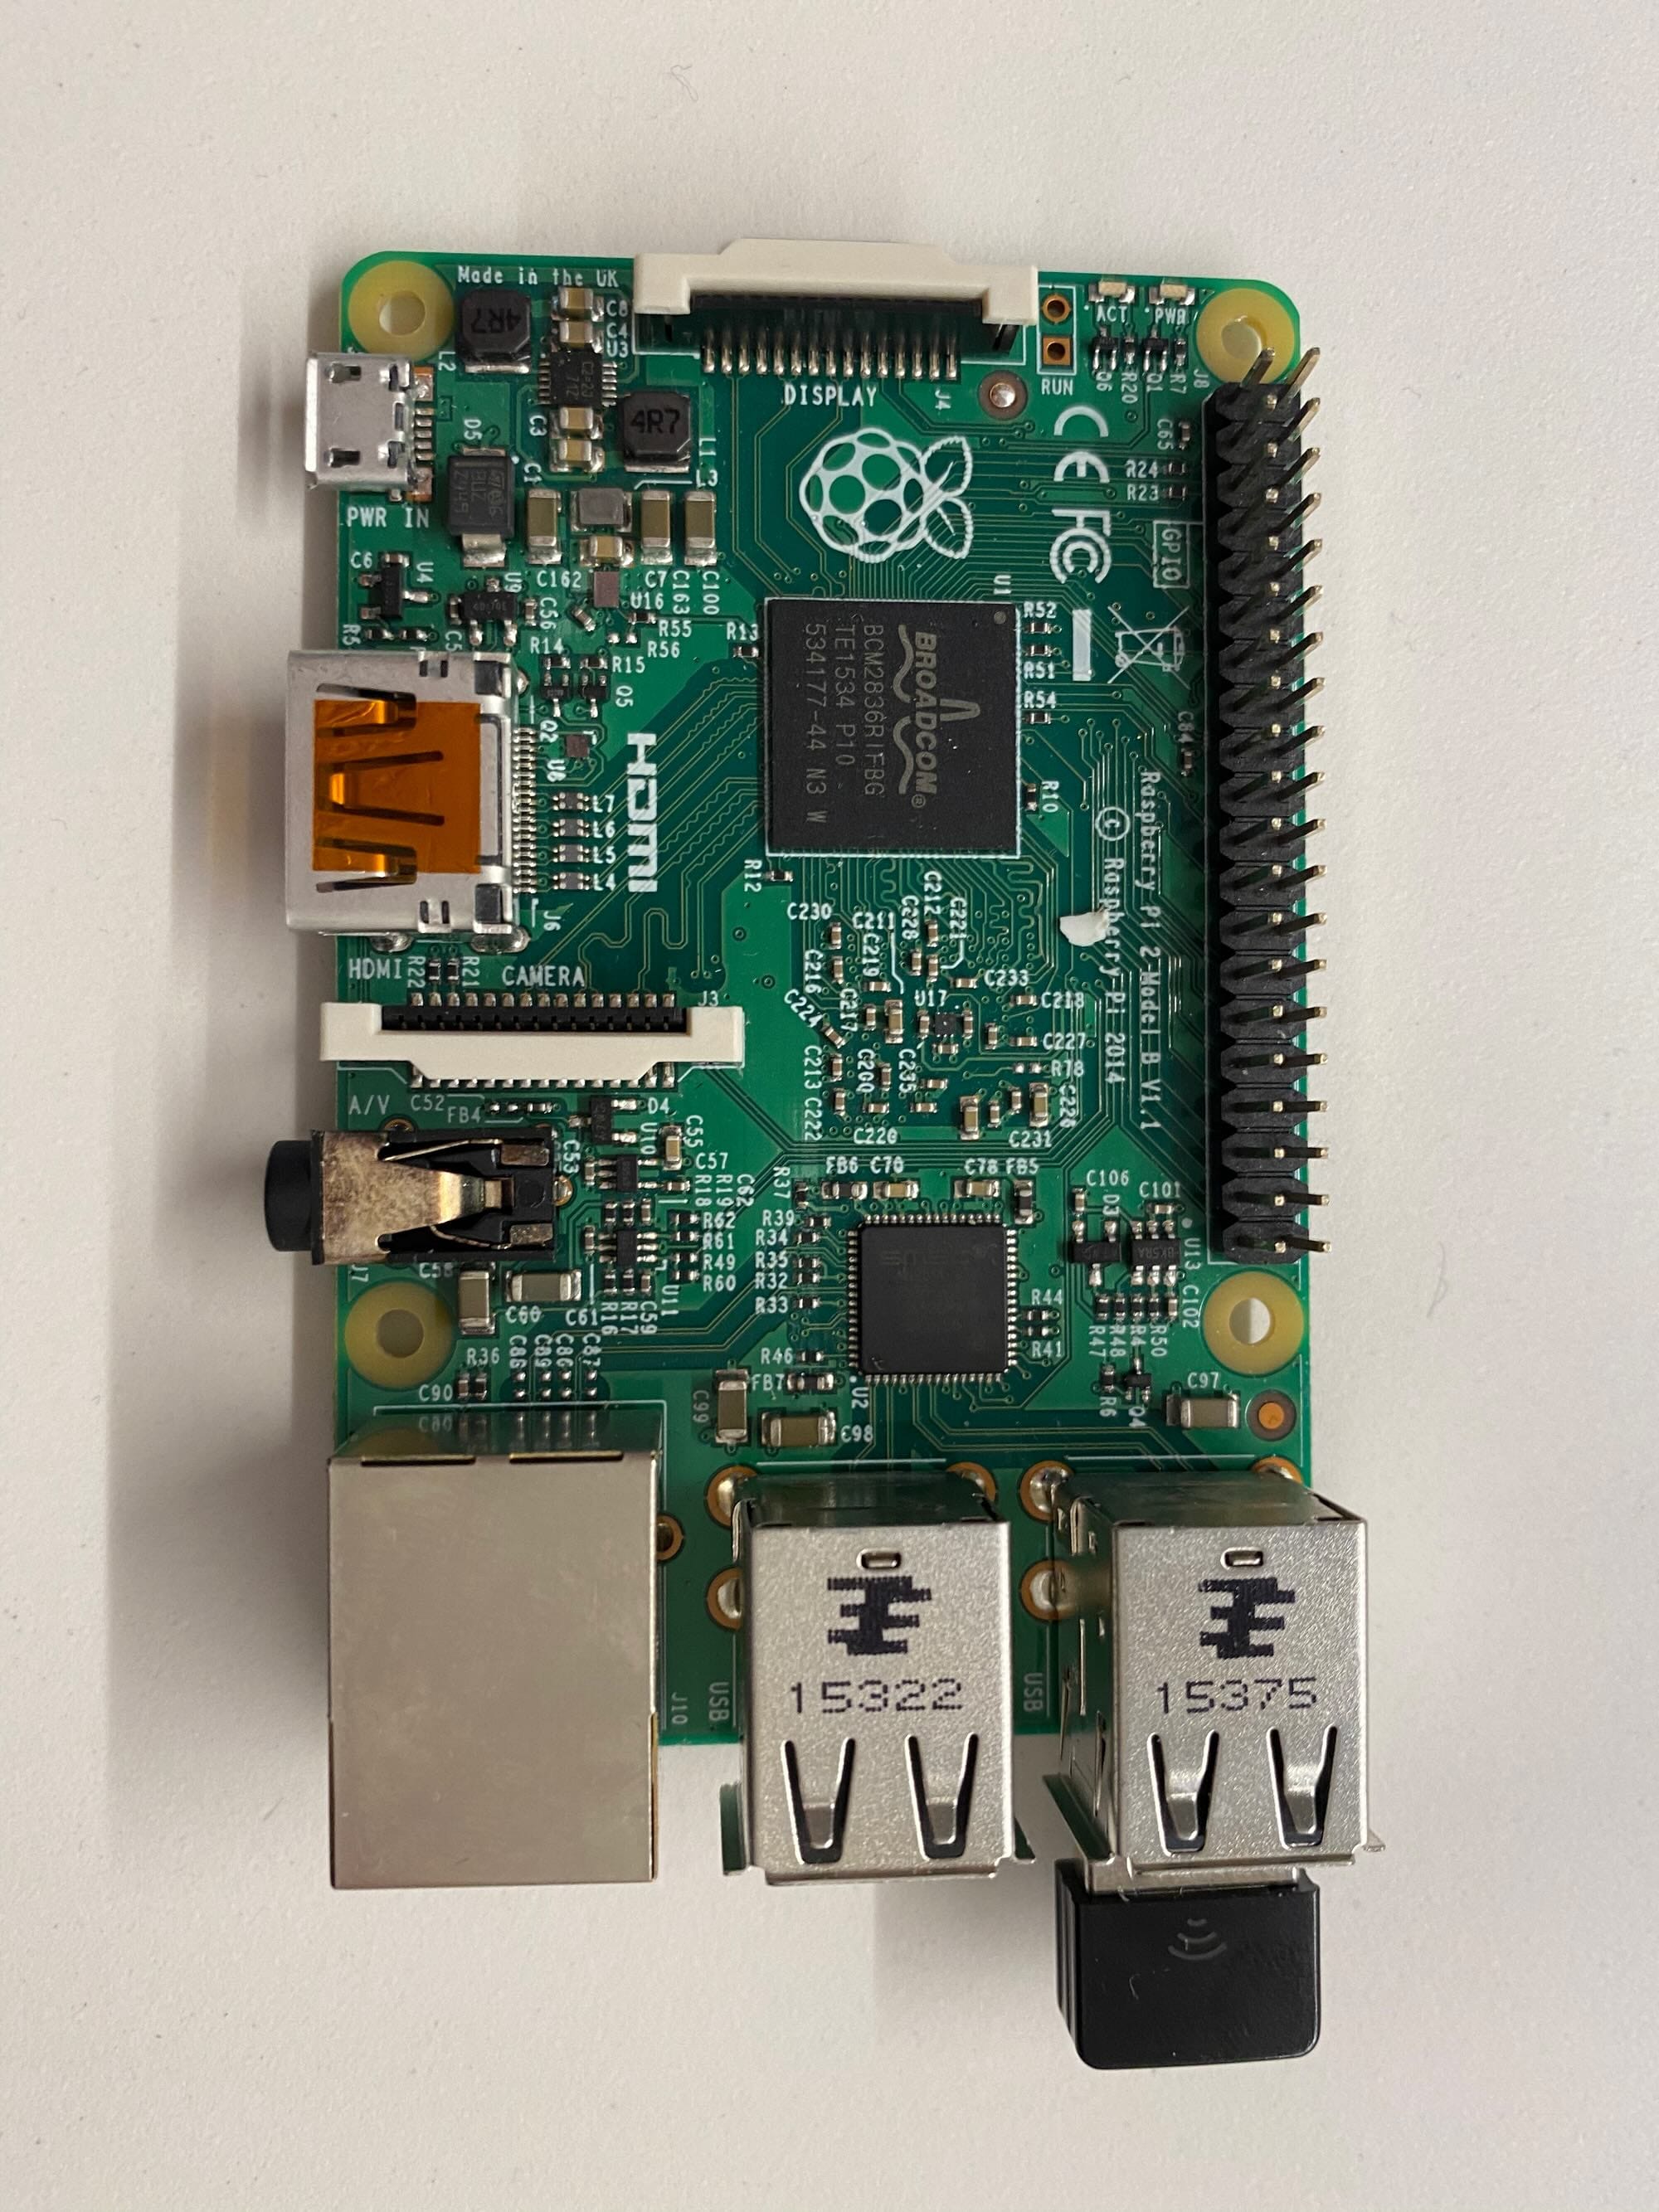
Can I use any Raspberry Pi model for monitoring airplane traffic?
Yes, you can use any Raspberry Pi model, but a more recent model like the Raspberry Pi 3 or 4 will provide better performance for processing and displaying data.
What are the benefits of monitoring airplane traffic with a Raspberry Pi?
Monitoring airplane traffic with a Raspberry Pi is cost-effective and educational. It provides real-time flight information and enhances understanding of aviation and radio signals.
Follow me
If you liked this article, Follow Me on Twitter to stay updated!