How to use Docker Security Scan Locally
How the new Docker security tool Docker Scan helps to push left and find bugs before they hit production

Docker and Snyk recently entered into a partnership to provide container vulnerability scanning. What does this mean for you? Snyk is now integrated with Docker Hub to scan official images. Additionally, Docker has integrated the Snyk scanning directly into Docker Desktop clients.
Before the Snyk partnership, we could not scan container vulnerabilities locally. Instead, we had to build our application and push it to our Git repository for the vulnerability scanning to occur.
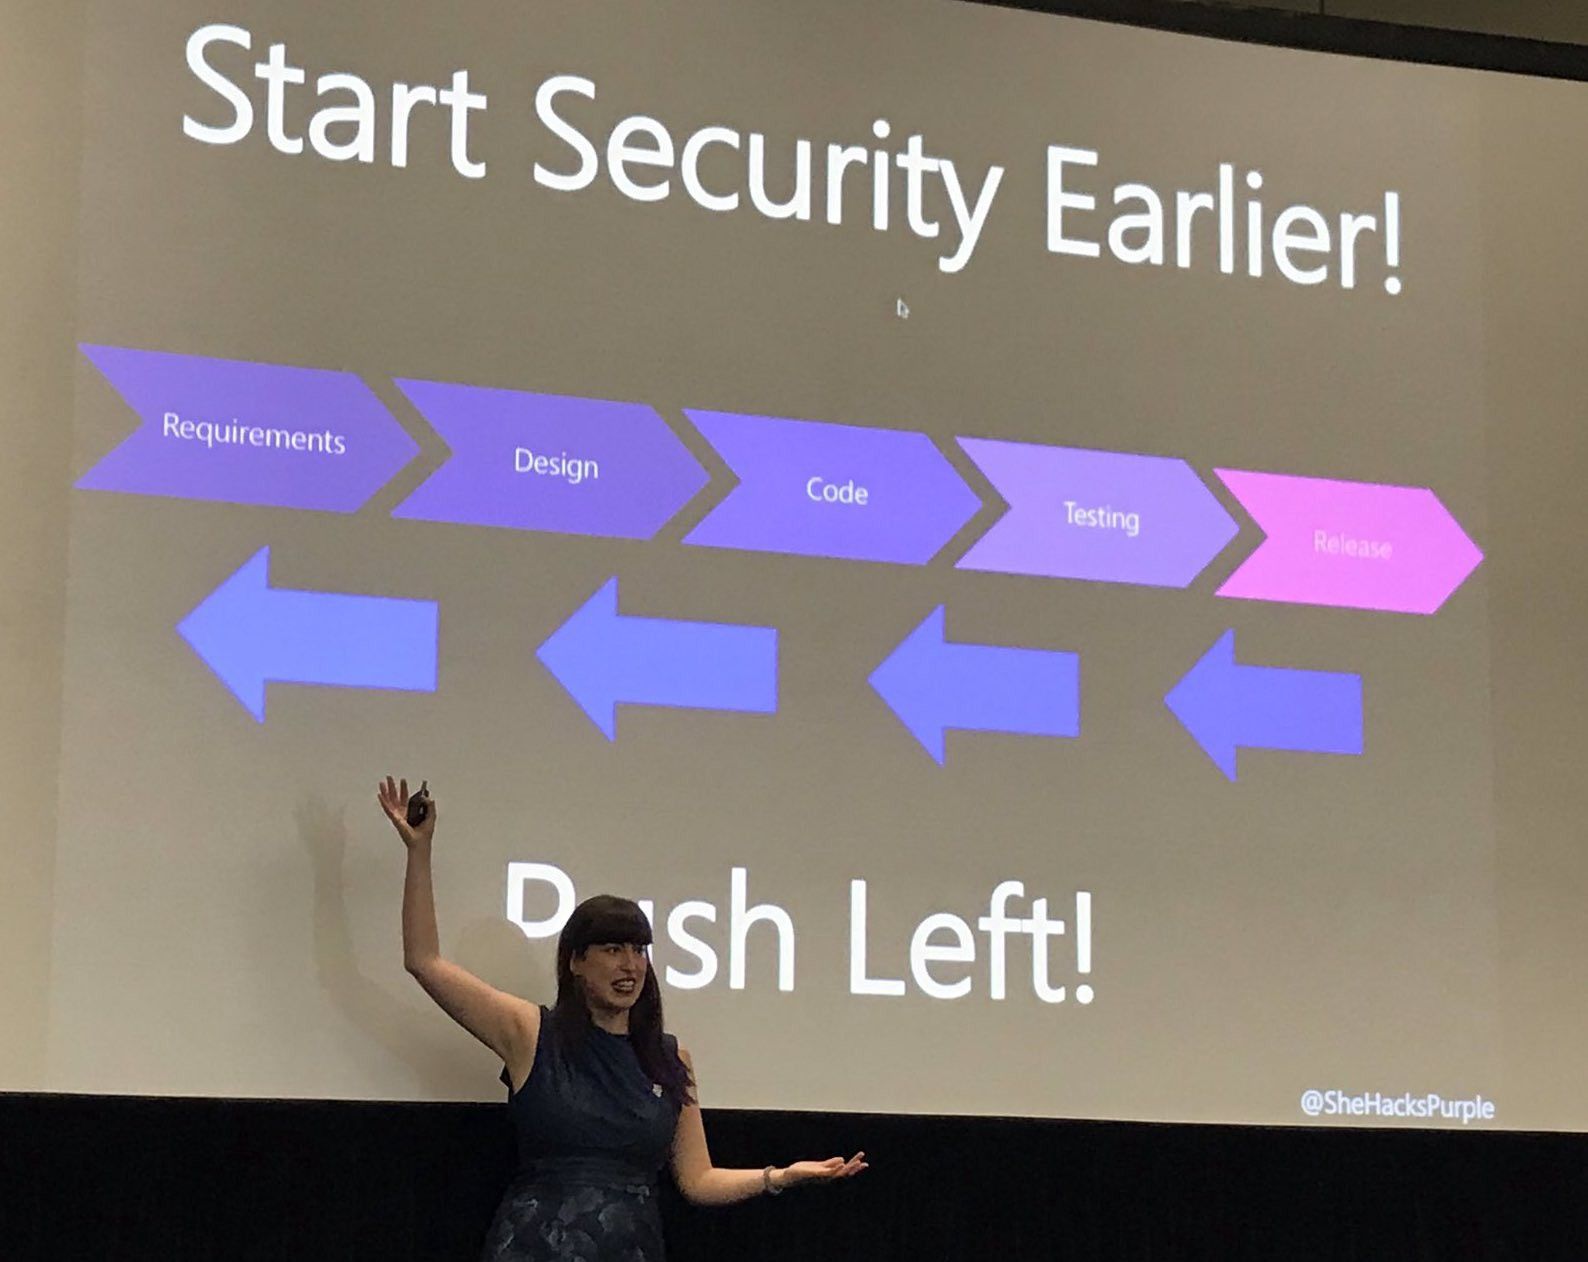
The best practice is to push Security as far left as possible. What do I mean by "Push Left"? I first heard this term during a presentation at DevOpsDay Zurich by Tanja Janca, aka SheHacksPurple.
The idea of pushing left is integrating Security as early in the development process. The earlier we can start security checks, the cheaper and more efficient it is for the organization.
Docker Scan pushes left to the point of our local development environment. From a DevSecOps perspective, this is an outstanding achievement. We can catch Security vulnerabilities locally before pushing any code.
How does Docker Scan work?
Docker included a new command in 2.3.6.0 or later versions called docker scan. When running the `docker scan` command, it scans local images against the Snyk security engine, providing you with security visibility into your local Dockerfiles and local images.
The Snyk engine scans the images or Dockerfiles for Common Vulnerabilities and Exposures (CVEs) and recommends CVE remediations.
How to initiate a Docker Scan
From the Docker CLI, we can initiate a vulnerability scan.
- Ensure you have Docker version 2.3.6.0 or later installed
- Pull a the Mongo Database image for testing
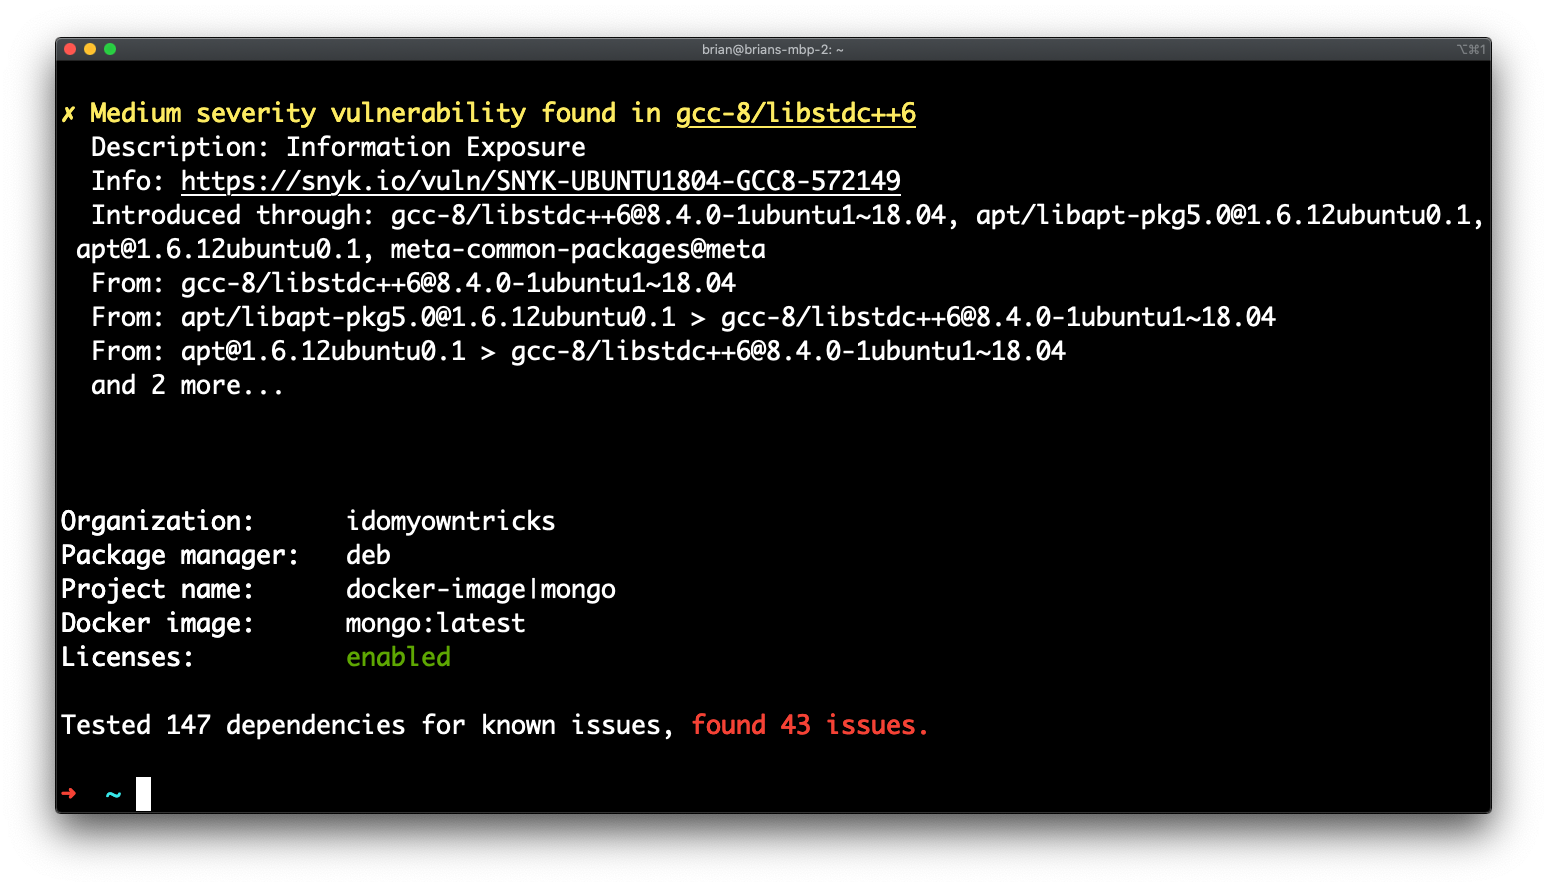
docker pull mongo:latest - Run a scan against the Mongo image
docker scan mongo:latest - Review the results of the scan
How to initiate a Docker Scan on an Image and reference a Dockerfile
What is the difference between scanning an image and scanning an image and referencing a Dockerfile? When including the Dockerfile associated with the image provides even more detailed results.
Stay Updated
Get actionable AI & tech insights delivered every Friday. No fluff, just value.
Subscribe to The Weekly Byte →- Clone the linux_tweet_app demo application
git clone https://github.com/vegasbrianc/linux_tweet_app.git - Build and tag the image:
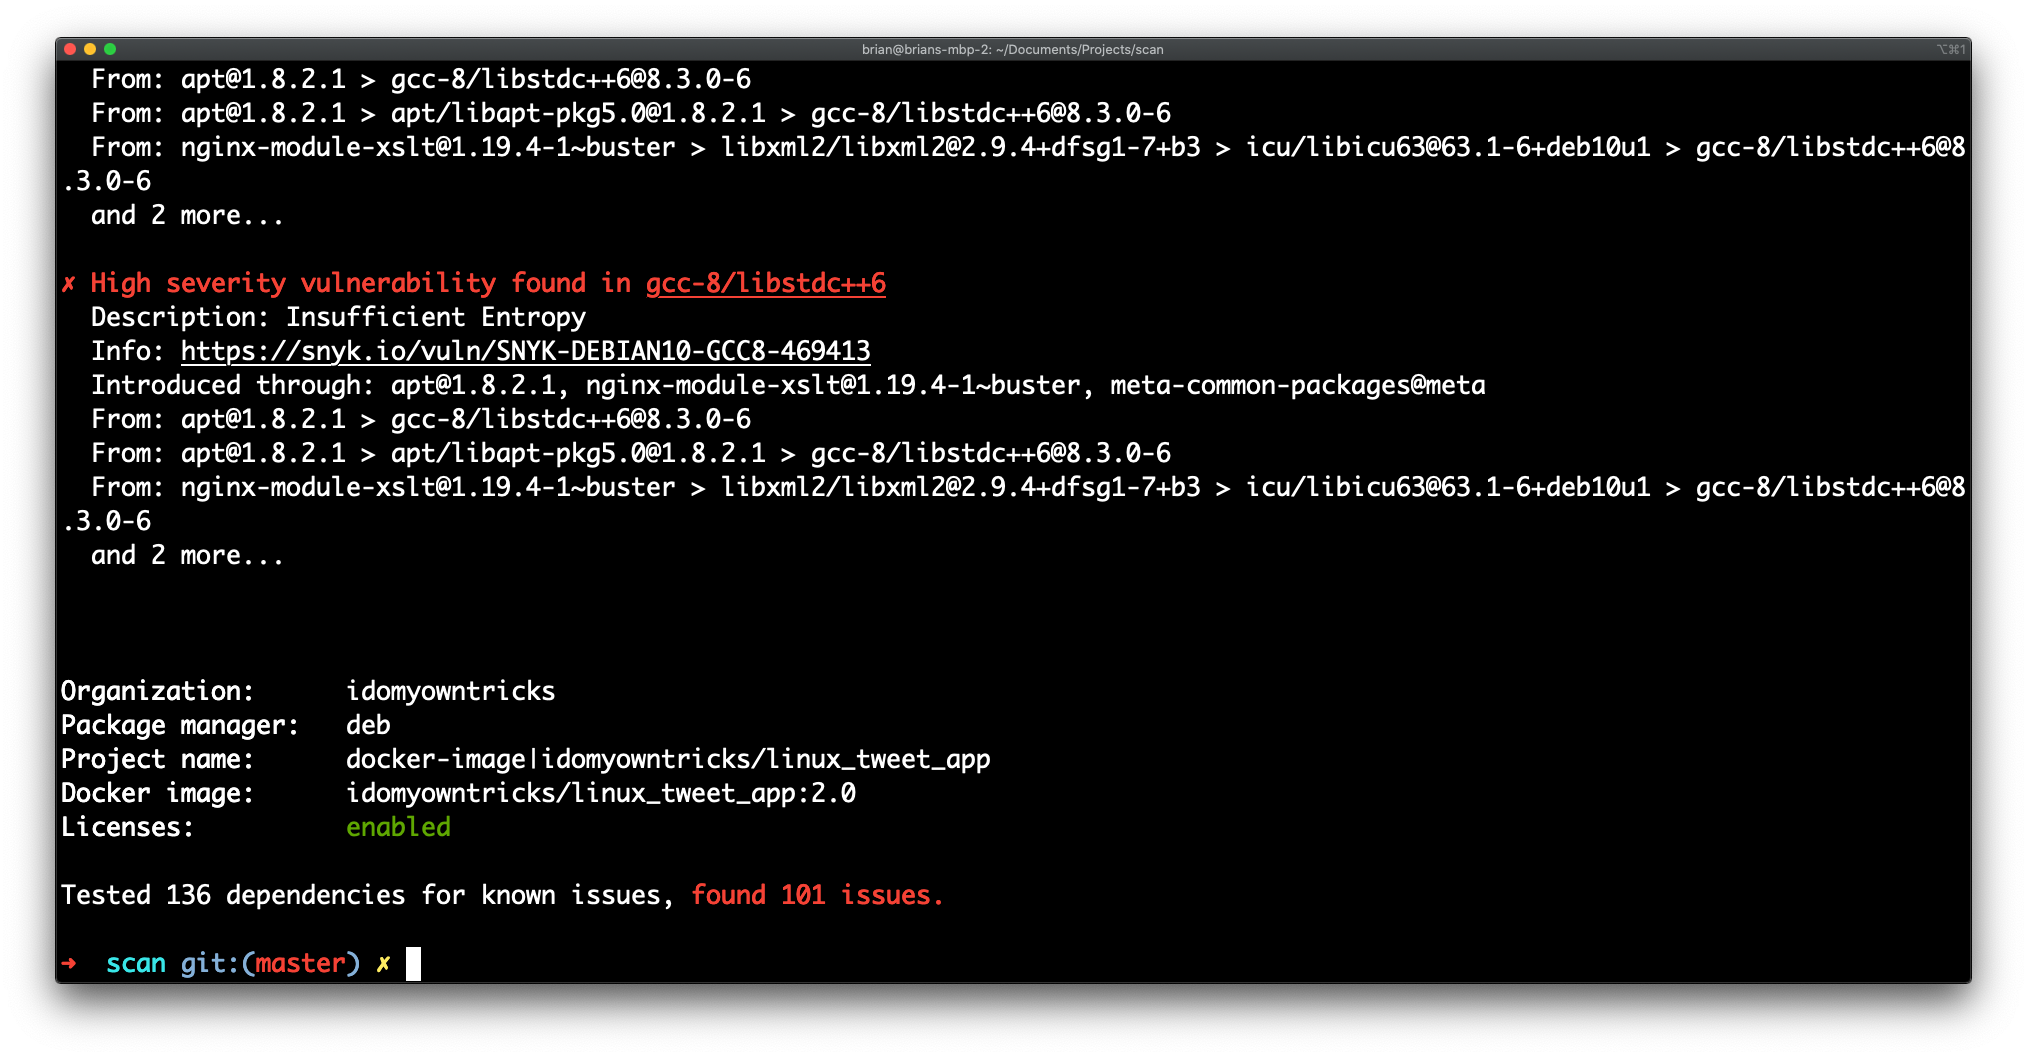
docker build -t linux_tweet_app:1.0 . - Scan the image:
docker scan linux_twee_app:1.0
Now, rerun the scan, referencing the Dockerfile we built with the image.
- Scan the image and reference the Dockerfile:
docker scan -f Dockerfile linux_tweet_app:1.0
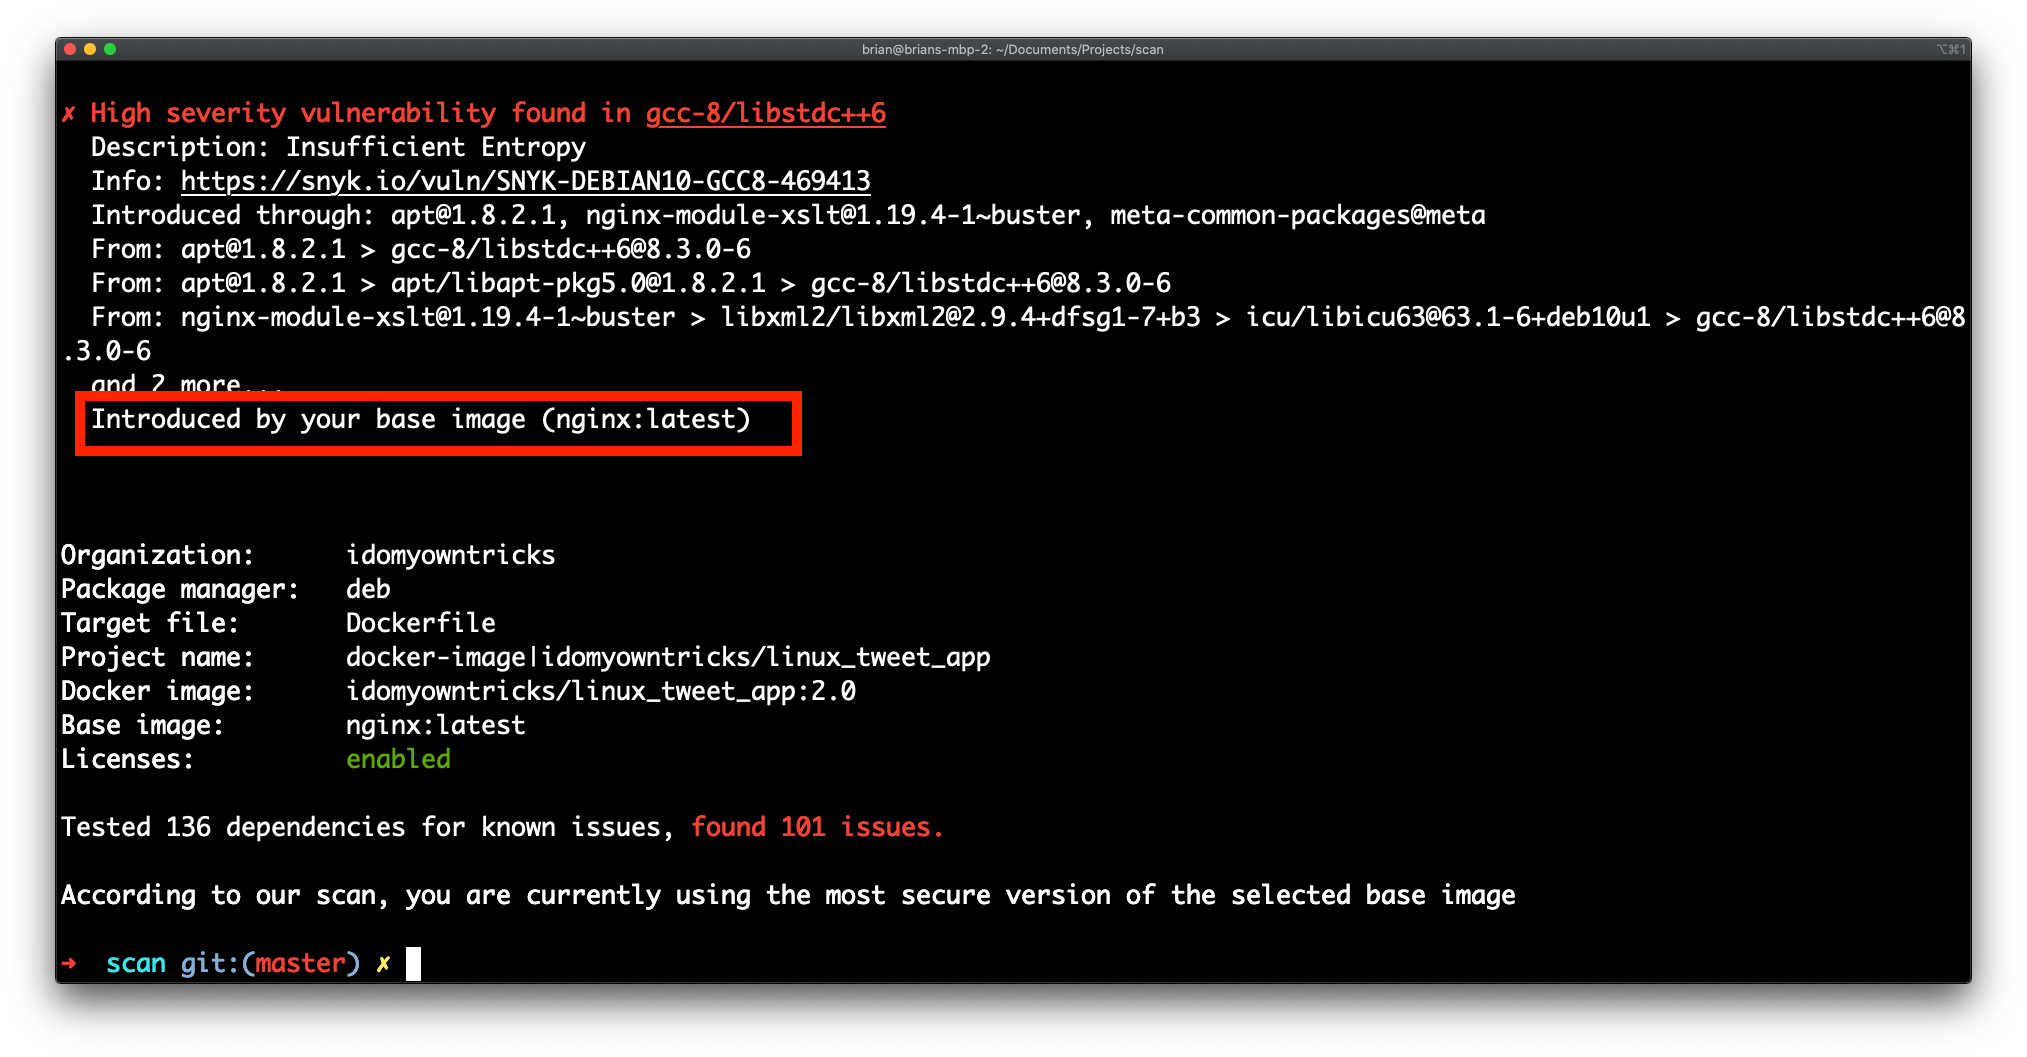
Notice that the results now indicate which layer in the Dockerfile is responsible for which vulnerabilities.
Docker scan output options
We have a few different options for viewing the docker scan output. You can view the results in JSON format or as a dependency tree. I must admit the dependency tree is beneficial in figuring out the structure of your image.
Docker scan summary
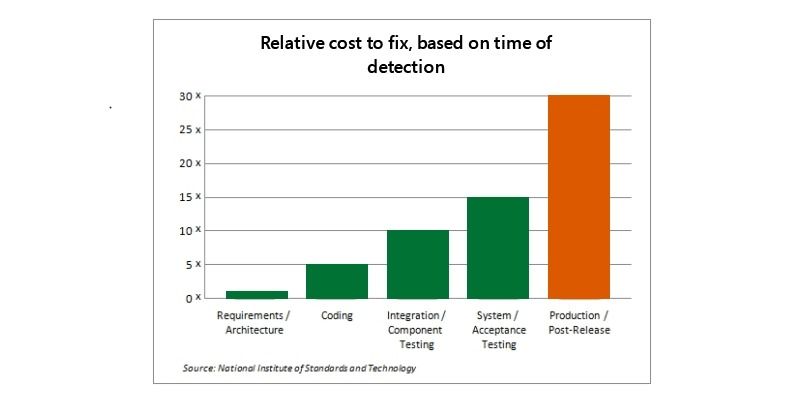
Pushing left will help your organization spot CVE's before they ever hit your Development or Test environments. As mentioned previously, the more we can push Security left, the more time and money we save our organization.
The graph below provided by the National Institute of Standards and Technology says bugs (which also applies to vulnerabilities) found in development cost $80 to fix. In contrast, vulnerabilities that make it to production cost $7600 to fix.
Docker scan helps us push left, find, and squash vulnerabilities sooner, saving us time and money. Happy days! Now celebrate all the time and money we will be saving!
FAQ: How to Use Docker Scan
1. What is Docker Scan and why should I use it?
Docker Scan is a tool integrated with Docker to help identify security vulnerabilities in your Docker images. Using Docker Scan helps ensure your applications are secure by detecting potential risks early in the development process.
2. How do I install Docker Scan?
Docker Scan is included with Docker Desktop starting from version 20.10. Simply update to the latest version of Docker Desktop to get Docker Scan. For CLI users, ensure you have the latest Docker CLI version to access Docker Scan.
3. How do I use Docker Scan to analyze an image?
To analyze a Docker image, use the command docker scan <image_name>. This will initiate a scan and provide a detailed report on any vulnerabilities found in the image, along with recommendations for remediation.
4. What types of vulnerabilities can Docker Scan detect?
Docker Scan can detect various types of vulnerabilities, including those related to outdated software packages, insecure configurations, and potential exploit paths. It leverages the Snyk vulnerability database to provide up-to-date and comprehensive security information.
5. How can I improve my Docker image security based on scan results?
To improve Docker image security, follow the recommendations provided in the Docker Scan report. This may include updating software packages, removing unnecessary components, and following best practices for Docker image creation and maintenance.
Follow me
If you liked this article, Follow Me on Twitter to stay updated!