How to Resize Ubuntu Root Partition

I used to be able to do these tasks with my eyes closed with AIX and other version of Linux and Unix. Today my brain blue screened on me while trying to expand my Ubuntu machine's root volume group, logical volume, and filesystem. Wow it's been awhile.
So instead of racking my brain in the future I will jot down the process here for anyone else stuck in the same situation.
How to expand Ubuntu root filesystem
So a quick recap for those that don't remember. We have to expand components of the filesystem in the following order. Physical Volume -> Volume Group -> Logical Volume -> Filesystem
In my scenario I increased the size of my Virtual Machine disk in VMware from 18GB to 28 GB.
- Step 1 Before we get started run pvdisplay in order to see the current state of the physical volume
root@Docker01:~# pvdisplay
--- Physical volume ---
  PV Name               /dev/sda1
  VG Name               ubuvg
  PV Size               16.00 GiB / not usable 2.00 MiB
  Allocatable           yes
  PE Size               4.00 MiB
  Total PE              4095
  Free PE               678
  Allocated PE          3417
  PV UUID               HiNAY2-sfqz-7fwT-tLvy-XKfT-3QR6-BXash5
- Step 2 Manipulate the disk partition table with fdisk
root@Docker01:~# fdisk /dev/sdb
n   (create new partition, select start and end cylinders, all free space is selected by default)
Partition type:
   p   primary (1 primary, 0 extended, 3 free)
   e   extended
Select (default p):
Using default response p
Partition number (1-4, default 2):
Using default value 2
First sector (33552384-33554431, default 33552384):
Using default value 33552384
Last sector, +sectors or +size{K,M,G} (33552384-33554431, default 33554431):
Using default value 33554431
w  (save partition table and exit)
Accept the default values that are provide that the "n" option returns.
-
Step 3 Reboot your Ubuntu machine in order for Ubuntu to recognize the change.
root@Docker01:~# reboot -
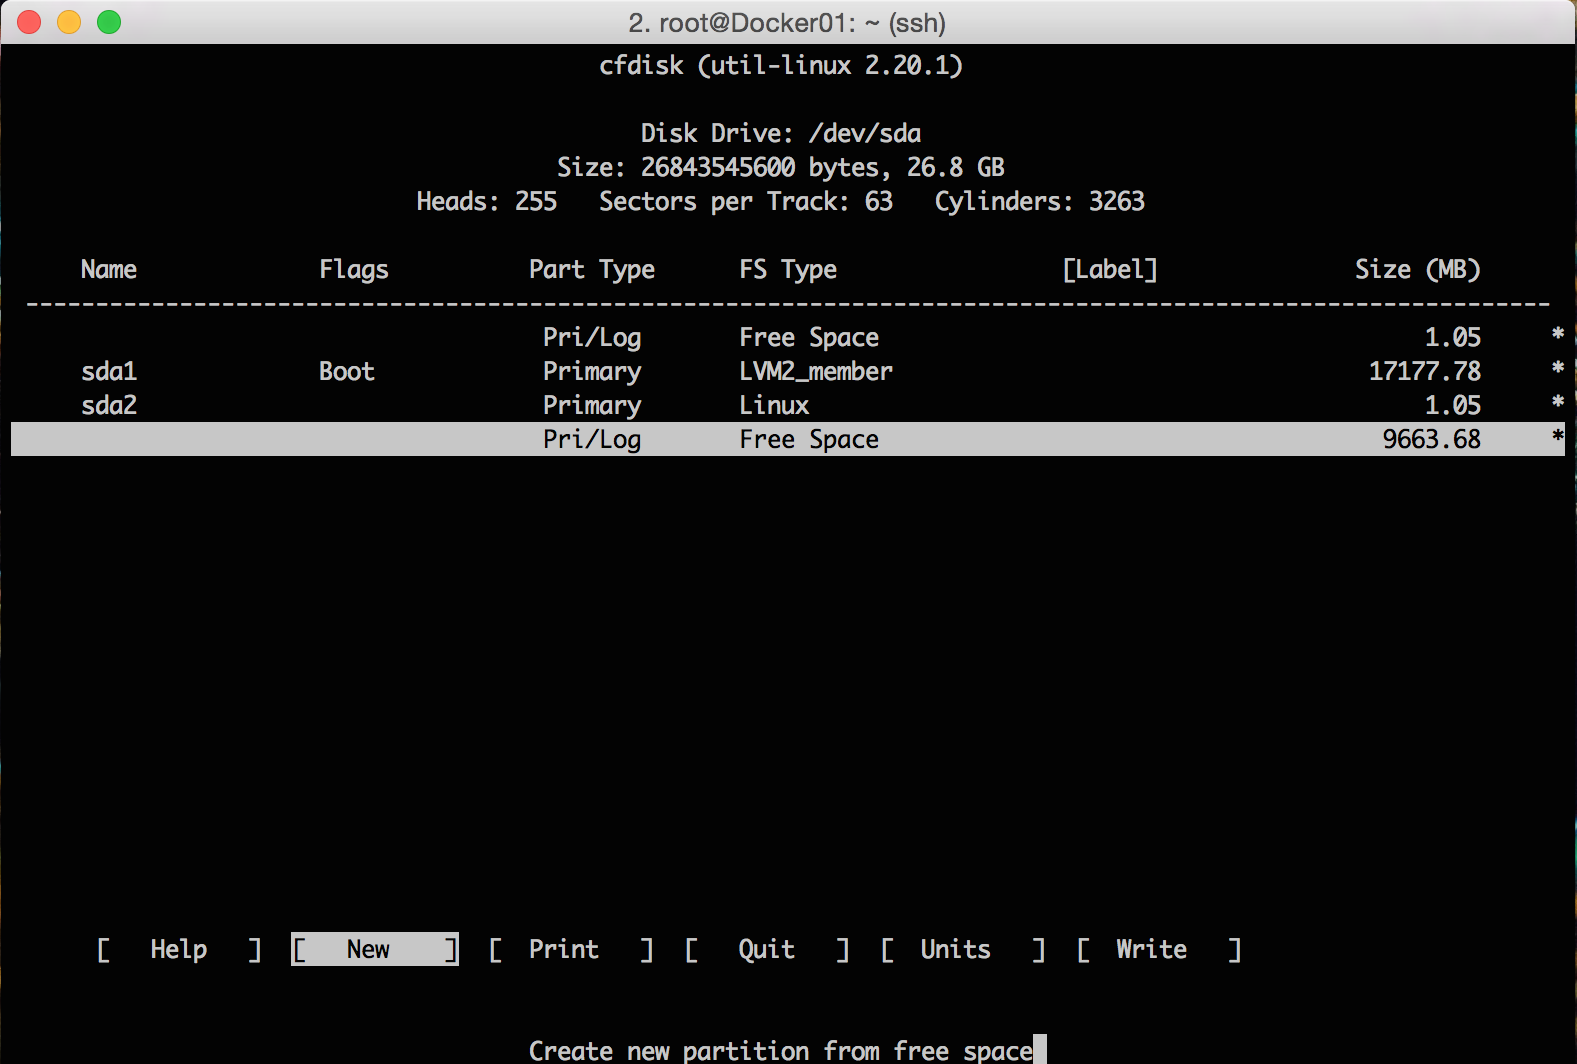
Step 4 Update the partition table tool using cfdisk.
root@Docker01:~# cfdisk
Select [NEW] partition and [PRIMARY] for partition type. Select how big you want the partition and enter.
Once finished select [WRITE] to save your changes to your partition then [QUIT].
You've now created a new partition most likely /dev/sda1

-
Step 5 Intialize the newly created partition with pvcreate
root@Docker01:~# pvcreate /dev/sda3
Physical volume "/dev/sda3" successfully created
- Step 6 Add the newly created partition to the root volume group. First rerun pvdisplay to show the new physical volume details. You should now see the new partition
  "/dev/sda3" is a new physical volume of "9.00 GiB"
  --- NEW Physical volume ---
  PV Name               /dev/sda3
  VG Name
  PV Size               9.00 GiB
  Allocatable           NO
  PE Size               0
  Total PE              0
  Free PE               0
  Allocated PE          0
  PV UUID               OEADew-tamR-EHil-FU4p-kIuW-F5rT-V0CTcY
Run the command vgs in order to get the name of your volume group
root@Docker01:~# vgs
  VG    #PV #LV #SN Attr   VSize  VFree
  ubuvg   1   5   0 wz--n- 16.00g 2.65g
Expand the volume group with vgextend then verify your volume group again once complete with vgs
root@Docker01:~# vgextend ubuvg /dev/sda3
  Volume group "ubuvg" successfully extended
root@Docker01:~# vgs
  VG    #PV #LV #SN Attr   VSize  VFree
  ubuvg   2   5   0 wz--n- 24.99g 11.64g
root@Docker01:~#
- Step 7 Next we need to extend the Logical Volume with lvextend
root@Docker01:~# df -k
Filesystem                 1K-blocks    Used Available Use% Mounted on
/dev/mapper/ubuvg-ubulv      8726456 7739868    520260  94% /

root@Docker01:~# lvextend -L +10G /dev/mapper/ubuvg-ubulv
  Extending logical volume ubulv to 18.58 GiB
  Logical volume ubulv successfully resized
- Step 8 Extend the Filesystem to fill the logical volume
root@Docker01:~# resize2fs /dev/mapper/ubuvg-ubulv
resize2fs 1.42.9 (4-Feb-2014)
Filesystem at /dev/mapper/ubuvg-ubulv is mounted on /; on-line resizing required
old_desc_blocks = 1, new_desc_blocks = 2
The filesystem on /dev/mapper/ubuvg-ubulv is now 4871168 blocks long.

root@Docker01:~# df -k
Filesystem                 1K-blocks    Used Available Use% Mounted on
/dev/mapper/ubuvg-ubulv     19048316 7744220  10420152  43% /
Ubuntu Root Resize in Review
Hopefully this tutorial will save you time and give you a little more background on the flow of a resize. Important to remember is the path of the resize Physical Volume -> Volume Group -> Logical Volume -> Filesystem. We must follow this flow or the resize will either fail or encounter problems. If you use the Ubuntu GUI some tools contain the entire process in a single tool.
I'm a CLI junkie so no plans of me finding out how a GUI works anytime soon.
Follow me
If you liked this article be sure to Follow Me on Twitter to stay updated!


